
前回、別記事にすると言っていた件です。
Termux環境で動作するLet’s Encryptのワイルドカードドメインに対応した自動化ツールを探せ!
https://hack.gpl.jp/2020/09/11/wildcard-domain-acme/
今日のネタは、Termuxネイティブ環境で acme-nginx というPythonで、作られた自動化ツールで Let’s Encrypt のワイルドカードドメイン証明書を取得します。さぁうまく出来るでしょうか? ちなみに、ワイルドカード証明書とは、以下のようなことを言います。
ワイルドカード証明書とは
「*.example.jp」のように、コモンネームの一番左のラベルにアスタリスク(*)を指定したサーバー証明書です。
https://jprs.jp/pubcert/about/wildcard/
ワイルドカード証明書は「www.example.jp」「login.example.jp」「member.example.jp」のように、アスタリスクと同一階層のサブドメインのみが異なるすべてのサーバーにインストールできます。
また、JPRSの提供するワイルドカード証明書なら、「*.example.jp」の証明書を「example.jp」のようにアスタリスク(*)を除いたホスト名のサーバーでも利用できます。
では作ってみましょう。acme-nginx はもう入れてあるものとします。DNSはデジタルオーシャンに変更して、APIトークンを取得してあります。
ステップ1
適当な証明証を入れておくディレクトリを作っておきます。例では、example.jp というドメインで説明しています。
cd
mkdir -p ssl/example.jp
cd ssl/example.jp
ステップ2
アカウントキーと、ドメインキーを作成します。
openssl genrsa 4096 > account.key
openssl genrsa 4096 > example.jp.key
ステップ3
digitaloceanのトークンを環境変数に入れておきます。
export API_TOKEN=digitaloceanのトークンステップ4
証明書を発行します。WEBの認証はないので便利ですね。パスは、Termuxxの環境変数 $PREFIX に置き換えたほうが見やすいかもですね。
acme-nginx \
	--no-reload-nginx \
	-k /data/data/com.termux/files/home/ssl/example.jp/account.key \
	--dns-provider digitalocean \
	--domain-private-key /data/data/com.termux/files/home/ssl/example.jp/example.jp.key \
	-o /data/data/com.termux/files/home/ssl/example.jp/example.jp.crt \
	-d '*.example.jp' -d 'example.jp'
ドメインの指定は、*.example.jp と example.jp を指定します。そうしないと、example.jp でのドメインだけのアクセスで証明書が無効となります。
実際のログは(ドメイン名は置き換えていますが)以下のようになります。
2020-09-13 02:45:40,777 - INFO - trying to create account key /data/data/com.termux/files/home/ssl/example.jp/account.key
2020-09-13 02:45:41,727 - INFO - trying to register acmev2 account
2020-09-13 02:45:43,612 - INFO - already registered
2020-09-13 02:45:43,613 - INFO - trying to create domain key
2020-09-13 02:45:43,615 - INFO - acmev2 dns challenge
2020-09-13 02:45:43,615 - INFO - preparing new order
2020-09-13 02:45:46,648 - INFO - order created
2020-09-13 02:45:47,644 - INFO - verifying domain example.jp
2020-09-13 02:45:47,670 - INFO - creating TXT dns record _acme-challenge.example.jp IN TXT uWmLyGGgK1Jyj(省略)RHo-A5TUKBAac
2020-09-13 02:45:50,642 - INFO - asking acme server to verify challenge
2020-09-13 02:45:52,486 - INFO - waiting for example.jp challenge verification
2020-09-13 02:45:53,239 - INFO - example.jp verified!
2020-09-13 02:45:53,240 - INFO - delete dns record
2020-09-13 02:45:56,793 - INFO - verifying domain example.jp
2020-09-13 02:45:56,817 - INFO - creating TXT dns record _acme-challenge.example.jp IN TXT hP2bwoYASAQYL(省略)VkiKGDupZxfw0
2020-09-13 02:45:59,551 - INFO - asking acme server to verify challenge
2020-09-13 02:46:02,005 - INFO - waiting for example.jp challenge verification
2020-09-13 02:46:02,884 - INFO - example.jp verified!
2020-09-13 02:46:02,885 - INFO - delete dns record
2020-09-13 02:46:05,385 - INFO - signing certificate
2020-09-13 02:46:08,480 - INFO - certificate signed!
2020-09-13 02:46:08,480 - INFO - downloading certificate
2020-09-13 02:46:09,472 - INFO - writing result file in /data/data/com.termux/files/home/ssl/example.jp/example.jp.crt
30秒くらいで、完了していますね。dnsにテキストレコードを書いている部分が2回あります。ちゃんと認証が通ればテキストレコードは削除していますね。これは便利!作者に感謝です!
ステップ4
あとは、キーと証明書をnginxに設定して再起動しておきます。
・Key
 /data/data/com.termux/files/home/ssl/example.jp/example.jp.key

・CRT
 /data/data/com.termux/files/home/ssl/example.jp/example.jp.crt
あとは、実際のクライアントから確認してみます。
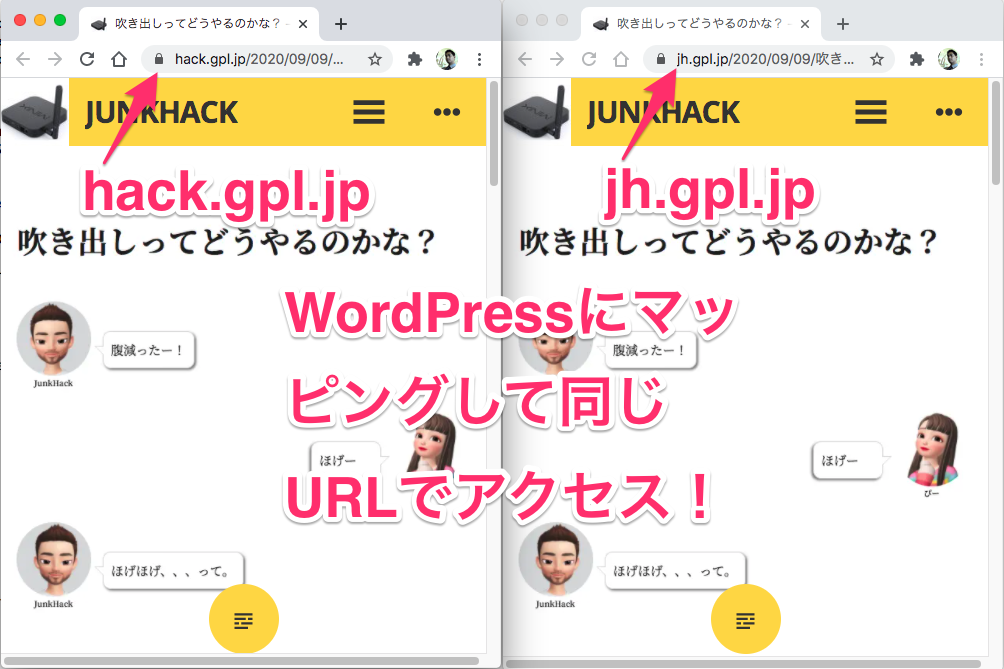
おー、鍵マークがかかっていますね。うまくできているようです! 今度は、curlで https://gpl.jp にアクセスできるか確認してみます。WordPressには、このドメインはマッピングしていないので、静的ファイルが置いてあるURLに対してアクセスしてみます。curlクライアントはリモートのMacからです。
$ curl -Iv https://gpl.jp/license.txt
*   Trying 116.58.181.140...
* TCP_NODELAY set
* Connected to gpl.jp (116.58.181.140) port 443 (#0)
* ALPN, offering h2
* ALPN, offering http/1.1
* Cipher selection: ALL:!EXPORT:!EXPORT40:!EXPORT56:!aNULL:!LOW:!RC4:@STRENGTH
* successfully set certificate verify locations:
*   CAfile: /etc/ssl/cert.pem
  CApath: none
* TLSv1.2 (OUT), TLS handshake, Client hello (1):
* TLSv1.2 (IN), TLS handshake, Server hello (2):
* TLSv1.2 (IN), TLS handshake, Certificate (11):
* TLSv1.2 (IN), TLS handshake, Server key exchange (12):
* TLSv1.2 (IN), TLS handshake, Server finished (14):
* TLSv1.2 (OUT), TLS handshake, Client key exchange (16):
* TLSv1.2 (OUT), TLS change cipher, Client hello (1):
* TLSv1.2 (OUT), TLS handshake, Finished (20):
* TLSv1.2 (IN), TLS change cipher, Client hello (1):
* TLSv1.2 (IN), TLS handshake, Finished (20):
* SSL connection using TLSv1.2 / ECDHE-RSA-AES256-GCM-SHA384
* ALPN, server accepted to use h2
* Server certificate:
*  subject: CN=*.gpl.jp
*  start date: Sep 12 16:46:12 2020 GMT
*  expire date: Dec 11 16:46:12 2020 GMT
*  subjectAltName: host "gpl.jp" matched cert's "gpl.jp"
*  issuer: C=US; O=Let's Encrypt; CN=Let's Encrypt Authority X3
*  SSL certificate verify ok.
* Using HTTP2, server supports multi-use
* Connection state changed (HTTP/2 confirmed)
* Copying HTTP/2 data in stream buffer to connection buffer after upgrade: len=0
* Using Stream ID: 1 (easy handle 0x7fd360002000)
> HEAD /license.txt HTTP/2
> Host: gpl.jp
> User-Agent: curl/7.54.0
> Accept: */*
>
* Connection state changed (MAX_CONCURRENT_STREAMS updated)!
< HTTP/2 200
HTTP/2 200
< server: nginx
server: nginx
< date: Sat, 12 Sep 2020 18:09:29 GMT
date: Sat, 12 Sep 2020 18:09:29 GMT
< content-type: text/plain; charset=utf-8
content-type: text/plain; charset=utf-8
< content-length: 19915
content-length: 19915
< last-modified: Wed, 12 Feb 2020 11:54:05 GMT
last-modified: Wed, 12 Feb 2020 11:54:05 GMT
< vary: Accept-Encoding
vary: Accept-Encoding
< etag: "5e43e75d-4dcb"
etag: "5e43e75d-4dcb"
< strict-transport-security: max-age=15552000
strict-transport-security: max-age=15552000
< x-xss-protection: 1; mode=block
x-xss-protection: 1; mode=block
< x-frame-options: DENY
x-frame-options: DENY
< x-frame-options: SAMEORIGIN
x-frame-options: SAMEORIGIN
< x-frame-options: ALLOW-FROM https://www.youtube.com https://www.wordpress.com
x-frame-options: ALLOW-FROM https://www.youtube.com https://www.wordpress.com
< x-content-type-options: nosniff
x-content-type-options: nosniff
< content-security-policy: default-src * 'self' data: 'unsafe-inline' 'unsafe-eval' ;
content-security-policy: default-src * 'self' data: 'unsafe-inline' 'unsafe-eval' ;
< referrer-policy: strict-origin
referrer-policy: strict-origin
< permissions-policy: fullscreen=() geolocation=()
permissions-policy: fullscreen=() geolocation=()
< x-hacker: Hello. :-)
x-hacker: Hello. :-)
< accept-ranges: bytes
accept-ranges: bytes

<
* Connection #0 to host gpl.jp left intact
ちょっと長いですが、途中「SSL certificate verify ok.」が出ていますね。接続は、TLS2 でHTTP/2 プロトコルになっていますね。これで当初の目的は達成できました! チェックサイトでは、A+判定出ていました。問題なさそうですね。
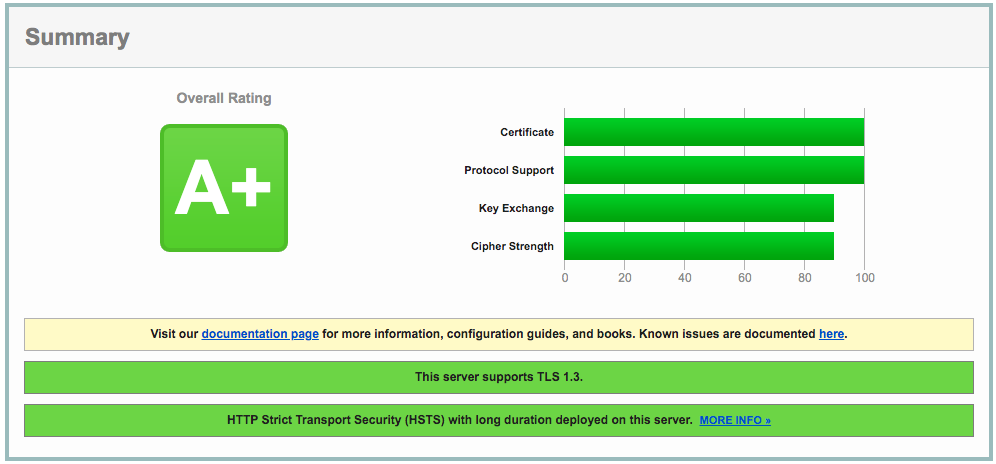
SSL Server Test (Qualys SSL Labs)
https://www.ssllabs.com/ssltest/
あとは、自動実行すればいいんですが termux の限られたリソースの中で cronjobを回して、ログを出し、何かあったらメールするっていうのをやるべきか、その他の方法を採用するかで迷っています。
そもそも、termux でcronjobはちゃんと動くか確認しておかないとです。なんたって、androidシステム上で動いているわけですから。Dozeモードの影響とかそういうのは大丈夫なのか確認しないとです。
定期実行しておく
手動で実行していましたが、Site24x7 の監視サービスからアラートが飛んでくるので(これはありがたい機能ですが)cronに登録しておきました。しばらく様子を見てみます。
# update SSL . Run at 5:30 on the 1st and 15th of every month
30 5 1,15 * * /data/data/com.termux/files/home/ssl/gpl.jp/renew-cert.sh | $PREFIX/bin/msmtp junkhack@gpl.jp
あとがき
気になることはいろいろありますが、そろそろデータの引っ越しをやりますかね。 WordPress.com から速めに引っ越しして、新環境で記事を書いて行きたいです。