前から、興味があった透過型のUARTーWiFIブリッジ的に使う方法をあれこれ試していました。
結論から言えば、出来ました。
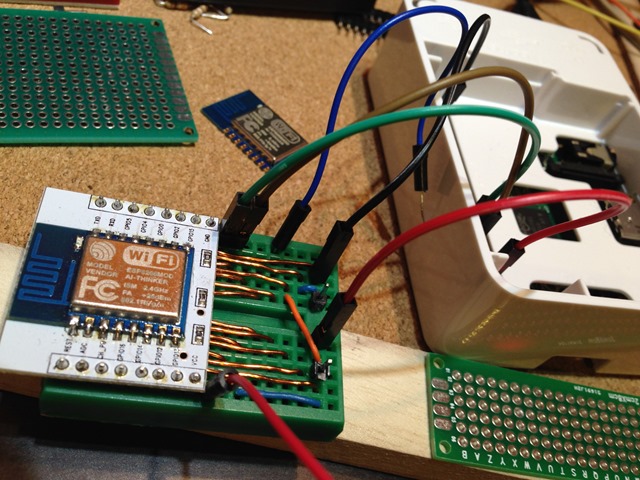
こんな感じで、電源はRasPi2 から取っていますので蓋の中に収められそうです。

ESP-12 に収めるプログラムは、なんとサンプルスケッチの中にありました。WiFiTelnetToSerial です。
/*
  WiFiTelnetToSerial - Example Transparent UART to Telnet Server for esp8266

  Copyright (c) 2015 Hristo Gochkov. All rights reserved.
  This file is part of the ESP8266WiFi library for Arduino environment.

  This library is free software; you can redistribute it and/or
  modify it under the terms of the GNU Lesser General Public
  License as published by the Free Software Foundation; either
  version 2.1 of the License, or (at your option) any later version.

  This library is distributed in the hope that it will be useful,
  but WITHOUT ANY WARRANTY; without even the implied warranty of
  MERCHANTABILITY or FITNESS FOR A PARTICULAR PURPOSE.  See the GNU
  Lesser General Public License for more details.

  You should have received a copy of the GNU Lesser General Public
  License along with this library; if not, write to the Free Software
  Foundation, Inc., 51 Franklin St, Fifth Floor, Boston, MA  02110-1301  USA
*/
#include <ESP8266WiFi.h>

//how many clients should be able to telnet to this ESP8266
#define MAX_SRV_CLIENTS 1
const char* ssid = "yyyyy";
const char* password = "xxxxx";

WiFiServer server(23);
WiFiClient serverClients[MAX_SRV_CLIENTS];

void setup() {
  Serial1.begin(115200);
  WiFi.begin(ssid, password);
  Serial1.print("\nConnecting to "); Serial1.println(ssid);
  uint8_t i = 0;
  while (WiFi.status() != WL_CONNECTED && i++ < 20) delay(500);
  if(i == 21){
    Serial1.print("Could not connect to"); Serial1.println(ssid);
    while(1) delay(500);
  }
  //start UART and the server
  Serial.begin(115200);
  server.begin();
  server.setNoDelay(true);

  Serial1.print("Ready! Use 'telnet ");
  Serial1.print(WiFi.localIP());
  Serial1.println(" 23' to connect");
}

void loop() {
  uint8_t i;
  //check if there are any new clients
  if (server.hasClient()){
    for(i = 0; i < MAX_SRV_CLIENTS; i++){
      //find free/disconnected spot
      if (!serverClients[i] || !serverClients[i].connected()){
        if(serverClients[i]) serverClients[i].stop();
        serverClients[i] = server.available();
        Serial1.print("New client: "); Serial1.print(i);
        continue;
      }
    }
    //no free/disconnected spot so reject
    WiFiClient serverClient = server.available();
    serverClient.stop();
  }
  //check clients for data
  for(i = 0; i < MAX_SRV_CLIENTS; i++){
    if (serverClients[i] && serverClients[i].connected()){
      if(serverClients[i].available()){
        //get data from the telnet client and push it to the UART
        while(serverClients[i].available()) Serial.write(serverClients[i].read());
      }
    }
  }
  //check UART for data
  if(Serial.available()){
    size_t len = Serial.available();
    uint8_t sbuf[len];
    Serial.readBytes(sbuf, len);
    //push UART data to all connected telnet clients
    for(i = 0; i < MAX_SRV_CLIENTS; i++){
      if (serverClients[i] && serverClients[i].connected()){
        serverClients[i].write(sbuf, len);
        delay(1);
      }
    }
  }
}
ArduinoIDE へ、ESP8266 Arduino Core の最新(ver. 1.6.5-1044-g170995a, built on Aug 10, 2015)を収めました。
SDK1.3 が収まったものは、以下のStaging versionから入れました。
https://github.com/esp8266/Arduino
Staging version
Boards manager link: http://arduino.esp8266.com/staging/package_esp8266com_index.json
リファレンスも出来て、だんだんと充実してきたようです。
スケッチは、スケッチの例>ESP8266Wifi >WiFiTelnetToSerial のところから辿っていきます。
ボード設定は、以下のようにしました。
Borad : Generic ESP8266 Module
Flash mode : QIOFlash frequency : 40Mhz
CPU frequency : 80Mhz
Flash size : 4M (3M SPIFFS)
Upload speed : 115200
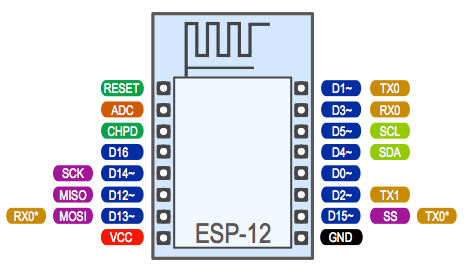
配線は、RasPi2 の TX RX を ESP12 のRX TX へつなぎ、3.3V のVCC と GND をつなぐ感じ。RasPiには、シリアルコンソールの設定がしてある状態で電源ON
5,6秒ほどで、ESP12 がアクセスポイントへ接続するので、ESP12 がIP を何をとっているか、DHCPの払い出しIP をを見て、以下のコマンドで接続。socat は brew で入れました。
$ socat STDIN tcp-connect:192.168.1.36:23
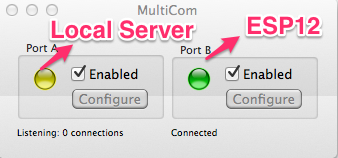
これで、シリアル接続のものは、WiFi 化できそうです。接続するツールは工夫する必要がありそうです。たとえば、osx だと、MultiCom というツールがあり、接続をパイプできるので便利です。


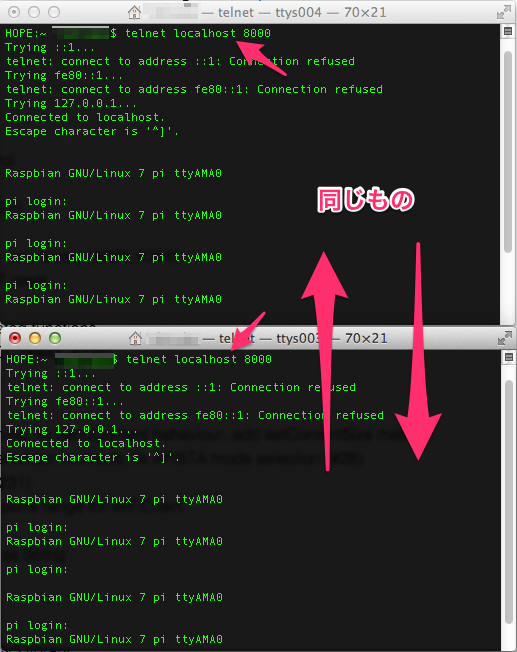
まだ、あんまり使い方はわかっていないんですが、IPとポート指定で ESP12 のWiFi へ接続し、それをローカルのプロキシーのようなものに接続し、複数接続できるようです。Windows のcom0com のようなのが欲しかったのですが、osx では見つけられませんでした。
あと、リモートからだと、コンソールのサイズも大きいほうが使いやすいので、getty の設定を以下のように変更。
—- /etc/default/console-setup
::
SCREEN_WIDTH=150
SCREEN_HEIGHT=60
あと、環境変数へ設定。
—- .bashrc
::
export LINES=150
export COLUMNS=60
とりあえず、こんな感じで使えるようになりました。tab補完や、そういうのはどうやるんでしょうね?ま、おいおい。
USB to シリアル がなくてもワイヤレスで、シリアルが使えるというのはなんとも、慣れないですが、今後活用のアイデアも出てくるかもしれません。ESP12 に下駄をはかせず、基盤にうまく実装すれば蓋の中に納まりそうですし。RasPiのベアメタル開発に手を出したときには便利かもしれませんね。
リチウム電池とESPを組み合わせて、単品のシリアルWiFi機器とすれば、何か応用できるかもです。
